
So this whole “being thrifty” thing is somewhat new to me. I’ll be honest and say that I wasn’t raised in a way that I needed to think creatively when it came to how I spent money. I’ve always been cheap…but that doesn’t mean I knew how to stretch my dollar. I just didn’t want to spend it in the first place (ha).
But when Chris and I got married I had to learn to maximize the money he was working so hard for and it has been challenging in some ways, but a lot of fun in other ways.
I used to walk into thrift stores and my nose would crinkle. The smell. The dirt. The stained upholstery. The only potential I saw in that place was for Germ-X to make a killing.
But one day I was skimming through and I actually saw something I liked. FOR CHEAP. And I was hooked.
(I am still a snob about fabrics and clothing. I may get there eventually, but for now I buy surfaces that I can sanitize the heck out of!)

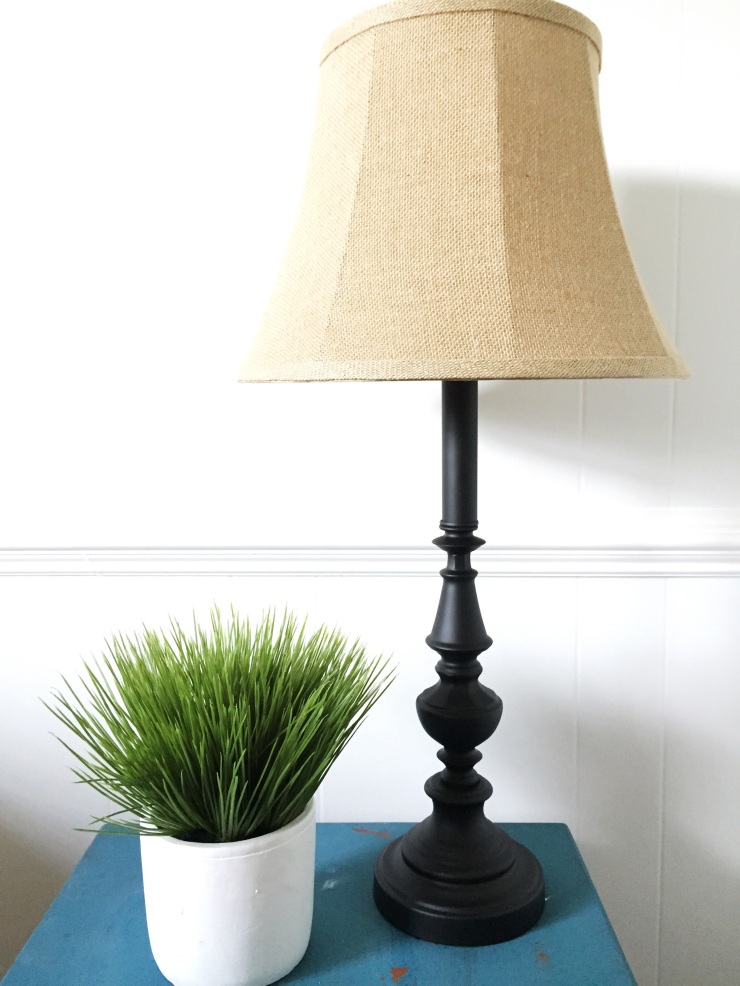
So with that long introduction, I am super excited to share my $2 lamp make-over!

When I saw these two brass beauties, my first reaction was to gag a little and bust them with a hammer. Not even kidding. I hate brass. But I tried to see the potential and found several “shapes” that I liked, and that determined which lamps I bought.
They were also having a 50% off sale. SCORE. So I was able to get both of these lamps for $4.
The re-do on these bad boys was super easy, but I’ll break it down in steps so it will be easy to find if you decide to do your own.
Step 1:
Wipe down lamp with wet cloth and let them dry.
Step 2:
If you don’t want to paint your cord (I painted mine because they were also a brass color), then i would tape off the cord at the base of the lamp, and then also tape off the area where the bulb will go.
Step 3:
Paint!! I used Rust-Oleum Professional High Performance Enamel in a flat black color. This stuff is amazing and creates such a beautiful finish. It doesn’t look like paint, it looks like its actually black metal. I used it on my dining room fixture and my kitchen knobs as well. So this was a can i had left over from another project, but it runs around $6 a can.
Step 4:
Let is dry and then touch up any spots that were missed. Find a lamp shade you love and BAM you’ve got a beautiful and affordable lamp!

Note: The most expensive part of this project was the lamp shade. I got mine at Wal-Mart for $15.97. That kinda killed me a little bit. But I have yet to find a nice lamp of this size for under $25 even at HomeGoods or TJ Maxx. So the entire cost of this lamp was $18. I’ll take that any day. 😉
